Scribble on Canvas and sell it as NFT (React, Truffle, IPFS, OpenSea)

I am a Professional Software Developer. On the backend side I work with Java on the frontend side I use React or Angular. Recently I made my baby steps in the fields of Machine Learning (mainly fast.ai) and Blockchain (Ethereum, Chainlink, Internet Computer(Dfinity)). This is where my professional interest lies.
The Big Picture
NFT-s are all over the news, that's why I decided to write a step-by-step tutorial which shows how to make and deploy one. My idea is to create a React Canvas component where artists (whoever who feels their artistic vein) can scribble whatever they wish and save the resulting image on IPFS. Based on this image we mint (create) a Non Fungible Token (an ERC721 Token) using an Ethereum smart contract and make it available on OpenSea. For financial reasons we use the Rinkeby Test Network instead of Ethereum Mainnet.
Here is a short demo:
The full code is available on Github .
Software Versions
- OS: Ubuntu 20.04.2 LTS
- node: v14.15.4
- npm: 6.14.10
- Truffle: v5.1.59
Creating and deploying the smart contract
As usual, execute the following command: npx create-react-app nft to create React frontend application with the name of nft. We'll use Truffle to compile and deploy our contract, so enter the nft folder and type truffle init. This gives us everything we need to work with smart contracts.
The structure of the project should be similar to this:
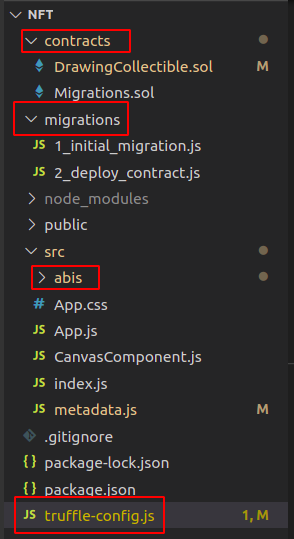
- The folder
contractis the place for well, contracts.Migration.solis automatically generated by Truffle - The folder
migrationsis for deployment-scripts. - The folder
abisis the place where the ABI Json files generated based on the contracts are. We need these ABI files to interact with the contract. This folder and its content appear only aftertruffle compile. - The file
truffle-config.jsis where we can configure truffle.
We will need a bunch of dependencies later:
  "@openzeppelin/contracts": "^3.4.1",
  "ipfs-api": "^26.1.2",
  "ipfs-http-client": "^49.0.4",
  "react-canvas-draw": "^1.1.1",
  "truffle": "^5.2.3",
  "truffle-hdwallet-provider": "^1.0.17",
  "web3": "^1.3.4"
so add them to package.json and hit npm install. After that you can replace the content of truffle-config.js with the following:
var HDWalletProvider = require("truffle-hdwallet-provider");

const mnemonic = "apple orange banana.... here comes your Metamask mnemonic ";
module.exports = {
  networks: {
    development: {
      host: "127.0.0.1",
      port: 7545,
      network_id: "*" // Match any network id
    },
    rinkeby: {
      provider: function () {
        return new HDWalletProvider(mnemonic, "https://rinkeby.infura.io/v3/HERE_COMES_INFURA_PROJECT_ID");
      },
      network_id: 4,
    }
  },
  contracts_build_directory: './src/abis/',
  compilers: {
    solc: {
      version: "0.6.6",
      optimizer: {
        enabled: true,
        runs: 200
      }
    }
  }
}
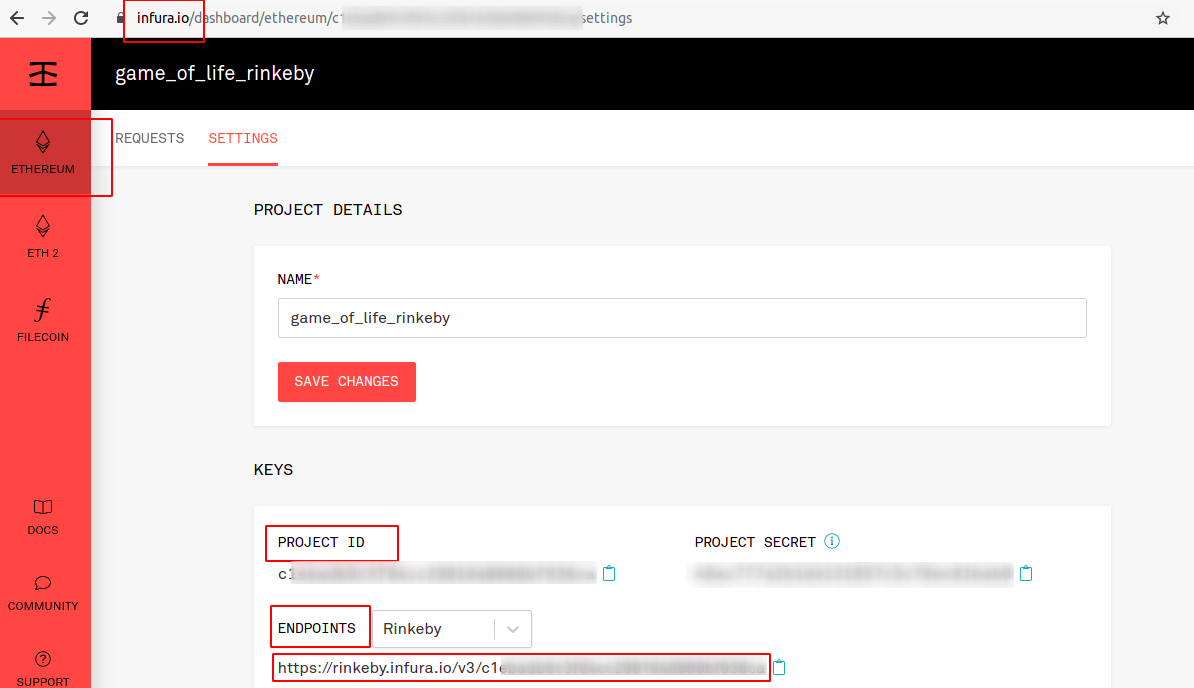
As you can see, the HDWalletProvider needs Infura. Infura is a company and they enable anyone to use the Ethereum Network and IPFS without installing and maintaining an Ethereum and/or IPFS nodes. Register on their website and create a project like this:
The HDWalletProvider also needs access to your Metamask, that's why you need to provide your Metamask-mnemonic. If you are like me and have already forgotten them long time ago here is where you can find them:
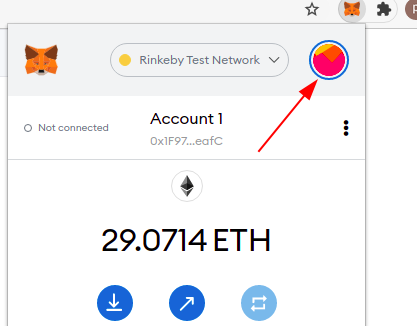 Click on the circle above then click on
 Settings then click on Security and Privacy and then click on Reveal Seed Phrase.
Now it's time to create a contract. The language for smart contracts is solidity. I believe that anyone with some javascript or maybe java knowledge can decipher the meaning of a simple contract. I am not saying that solidity is java or javascript but I do say that if you have some years of javascript experience the transition to solidity should not be super bumpy.
Create a file named DrawingCollectible.sol inside the contracts folder with the following content:
pragma solidity 0.6.6;

import "@openzeppelin/contracts/token/ERC721/ERC721.sol";
import "@openzeppelin/contracts/access/Ownable.sol";

contract DrawingCollectible is ERC721, Ownable {
    uint256 public tokenCounter;

    constructor() public ERC721("Drawing", "DRW") {
        tokenCounter = 0;
    }

    function createCollectible(string memory tokenURI)
        public
        onlyOwner
        returns (uint256)
    {
        uint256 newItemId = tokenCounter;
        _safeMint(msg.sender, newItemId);
        _setTokenURI(newItemId, tokenURI);
        tokenCounter = tokenCounter + 1;
        return newItemId;
    }
}
A couple of things here: in order to make our contract to comply with the NFT standards it needs to implement OpenZeppelin's ERC721 implementation. The constructor takes two arguments: the first one is the name, the second one is the symbol. These values are visible on OpenSea, Metamask, etc.
The minting (i.e. the creation) of a Non Fungible Token takes place in the createCollectible function. To make sure that only the owner can mint NFT-s this function uses the onlyOwner modifier from OpenZeppelin's Ownable implementation. We will call createCollectible from our React application and we will supply it a URI which points to a json object.
The contract is ready. Compile it with truffle compile.
To deploy it we need a new file called 2_deploy_contract.js with the following content:
const DrawingCollectible = artifacts.require("DrawingCollectible");

module.exports = function (deployer, network, accounts) {
    deployer.deploy(DrawingCollectible, { from: accounts[0] });
};
We can now deploy the contract running the
truffle migrate --reset --network rinkeby command.
Creating the Frontend
We use the Web3 library to interact with the blockchain.
In App.js I use the standard loadWeb3
  const loadWeb3 = async () => {
    if (window.ethereum) {
      window.web3 = new Web3(window.ethereum)
      await window.ethereum.enable()
    }
    else if (window.web3) {
      window.web3 = new Web3(window.web3.currentProvider)
    }
    else {
      window.alert('Non-Ethereum browser detected. You should consider trying MetaMask!')
    }
  };
We need an abi and an address to interact with any smart contract:
const contract = new web3.eth.Contract(DrawingCollectible.abi, contract_address);
This is included in theloadBlockChainData() function. The function also contains a check for the correct network (Rinkeby in this case) and sets the value of the relevant useState hooks (deployedContract, account, balance, name, symbol). Below is the full function:
const loadBlockchainData = async () => {
    const web3 = window.web3
    const networkId = await web3.eth.net.getId()
    if (networkId !== 4) {
      window.alert('Please switch network to the Rinkeby and refresh the page')
    }
    const networkData = DrawingCollectible.networks[networkId];
    if (networkData) {
      const contract_address = networkData.address;
      const contract = new web3.eth.Contract(DrawingCollectible.abi, contract_address);
      setDeployedContract(contract);
      const accounts = await web3.eth.getAccounts();
      setAccount(accounts[0])
      const bal = await web3.eth.getBalance(accounts[0]);
      setBalance(bal);
      contract.methods.name().call(function (err, res) {
        setName(res)
      });
      contract.methods.symbol().call(function (err, res) {
        setSymbol(res)
      });
    } else {
      alert("Wrong NETWORK")
    }
  }
I call these functions from useEffect which is just a modern way to say componentDidMount(). It runs only once when the component gets created.
 useEffect(() => {
    const load = async () => {
      await loadWeb3()
      await loadBlockchainData()
    }
    load();
  }, []);
Uploading to IPFS
We upload files to IPFS not once but twice. First the image, than the metadata based on the image. I'll explain it momentarily. But let's just create the canvas first.
Create another component and name it CanvasComponent.js. Here I use the CanvasDraw library.
import CanvasDraw from "react-canvas-draw";
The component has a button below the canvas. This button calls a function where we convert the canvas' content to an Uint8Array.
 let canvas = canvasRef.current.canvasContainer.children[1];
 let dataUrl = canvas.toDataURL("image/png");
 const buffer = Buffer(dataUrl.split(",")[1], 'base64');
We need to do this because Uint8Array is the format that IPFS accepts:
 Now we can make the image upload:
ipfs.files.add(buffer, (error, result) => {
     if (result) {
           //her we need to create the metadata json.
     }
     if (error) {
         console.log(error)
     }
The result here will be a hash. Append this hash to the end of http://ipfs.infura.io/ipfs/ URI and we get the URI of the uploaded image:
https://ipfs.infura.io/ipfs/QmY8vF9PxemEytzqh6Jo5BqCWPEVd5BKH8ZaGXMjVYPSTo
Storing large data on blockchain is cost-prohibitive. In fact, in order to save on gas fees, we would like to store as little data on blockchain as possible. This is where off-chain metadata comes in to play. We need a metadata file that complies with the metadata standards.
In our case it's a javascript object like this:
let metadata = {
    "name": "Here comes the name",
    "description": "no need for this",
    "image": "image",
    "attributes": []
}
So when the result from the first IPFS upload is in we modify the metadata to contain the URI of the image:
metadata.image = INFURA_HTTPS + result[0].hash;
and once again call ipfs.files.add this time with the content of metaadata:
 let metadataBuffer = Buffer.from(JSON.stringify(metadata));
 ipfs.files.add(metadataBuffer, (error, secondResult) => {
    if (secondResult) {
        ....
    }
The result well be a hash again. We need to create another valid URI from this hash. This URI will be the `tokenURI' that our contract accepts.:
 const tokenURI = INFURA_HTTPS + secondResult[0].hash;
 deployedContract.methods.createCollectible(tokenURI).send({ from: account }).on('transactionHash',
        (hash) => {
               console.log("success, transction hash: ", hash);
        })
That's it. Below is the full code of CanvasComponent.js
import React, { useRef } from 'react';
import CanvasDraw from "react-canvas-draw";
import metadata from './metadata.js'

//Declare IPFS
//const ipfsClient = require('ipfs-http-client')
//const ipfs = ipfsClient({ host: 'ipfs.infura.io', port: 5001, protocol: 'https' })

const ipfsAPI = require('ipfs-api')
const ipfs = ipfsAPI('ipfs.infura.io', '5001', { protocol: 'https' })

const INFURA_HTTPS = "https://ipfs.infura.io/ipfs/";
const WIDTH = 600;
const HEIGHT = 400;

const CanvasComponent = ({ deployedContract, account }) => {
    const canvasRef = useRef();
    const download = () => {
        let canvas = canvasRef.current.canvasContainer.children[1];
        let dataUrl = canvas.toDataURL("image/png");
        const buffer = Buffer(dataUrl.split(",")[1], 'base64');
        console.log(buffer)
        ipfs.files.add(buffer, (error, result) => {
            if (result) {
                metadata.image = INFURA_HTTPS + result[0].hash;
                console.log("image uploaded to IPFS image URI:" + metadata.image)
                console.log(metadata)
                let metadataBuffer = Buffer.from(JSON.stringify(metadata));
                ipfs.files.add(metadataBuffer, (error, secondResult) => {
                    if (secondResult) {
                        const tokenURI = INFURA_HTTPS + secondResult[0].hash;
                        console.log("Metadata uploaded to IPFS image as JSON URI:" + tokenURI)
                        deployedContract.methods.createCollectible(tokenURI).send({ from: account }).on('transactionHash', (hash) => {
                            console.log("success, transction hash: ", hash);
                        })
                    }
                    if (error) {
                        console.log(error)
                    }
                })
            }
            if (error) {
                console.log(error)
            }
        })
    }

    return (
        <div>
            <CanvasDraw
                canvasWidth={WIDTH}
                canvasHeight={HEIGHT}
                ref={canvasRef}
            />
            <button
                onClick={download}
                className="button">
                Download
            </button>
        </div>
    )
}

export default CanvasComponent
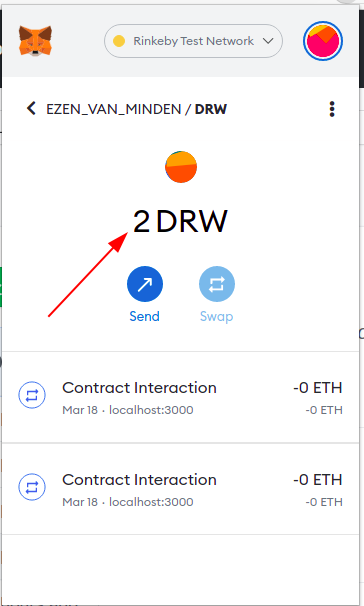
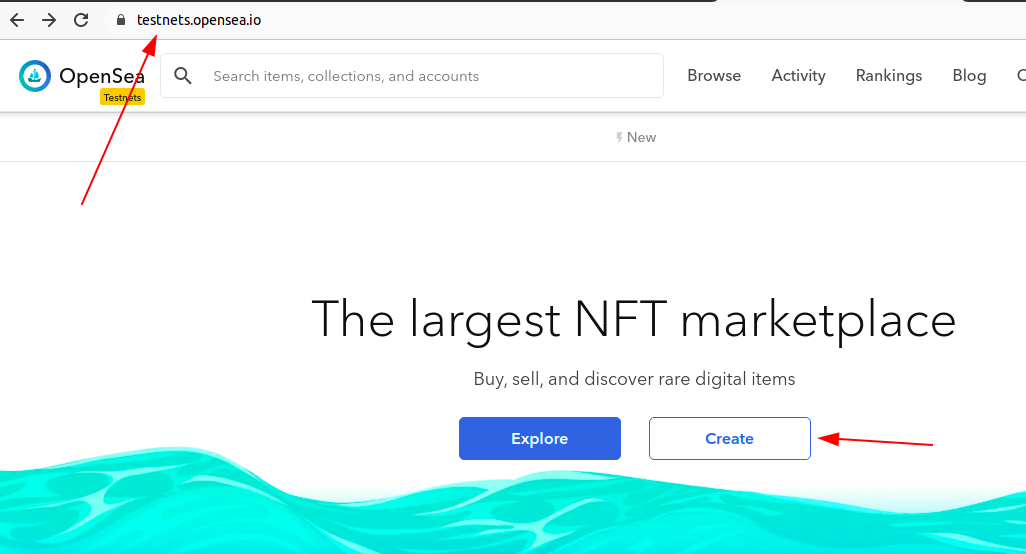
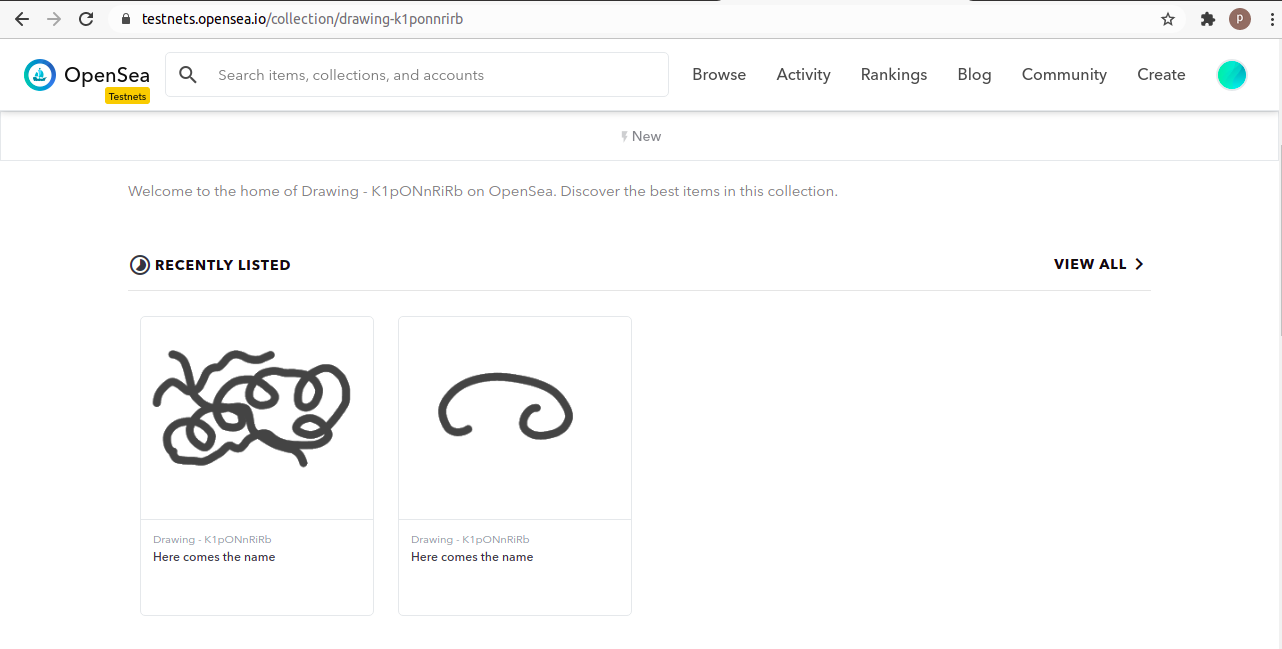
Basically that's it. I left out minor details but you can get the full project on Github. Start the npm server and go to http://localhost:3000/ Give room to your artistic vein and hit "Download". Then go to OpenSea. Make sure you are on the Rinkeby Test Network.
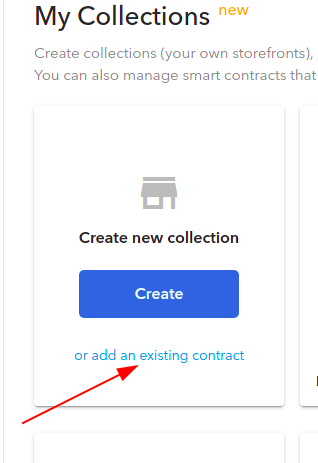
Connect with your wallet. Click on the or add existing Contract link.
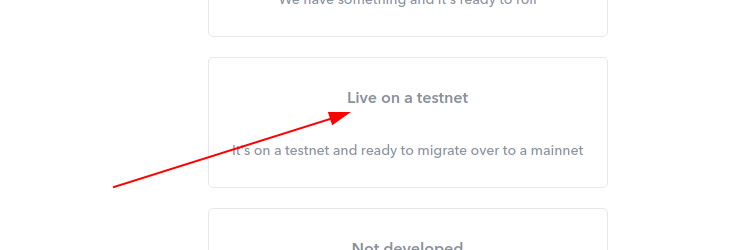
Choose Live on testnet
Then enter the contract's address. Which is visible on the upper left corner of the application:
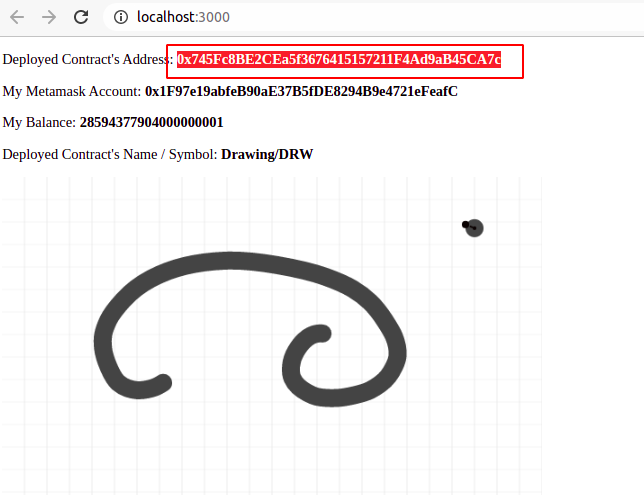
OpenSea displays the minted NFT-s.
Congrats! Now you know how to mint your own NFT and display it to the public.


