CRUD Application Tutorial using MySQL, Spring Boot, React Hooks and Docker - PART 2


The Big Picture
In this step-by-step tutorial we are going to create a fullstack CRUD Application using MySQL, Spring Boot, the modern, function-based React and Docker.
My goal is to write an easy-to-follow, step-by-step and detailed guide that demonstrates the use of the above mentioned technologies by creating a basic Customer Management System.
There's quite a bit of coding and configuration ahead of us that's why I will confine myself to the essentials which will be explained through code examples and screenshots. Let me tell you at the very beginning that we are not going to create therefore a pretty application; no fancy CSS styling or Footer, Header or anything similar. (The only exception is the minimal use of Bootstrap)
To keep it in manageable size, I break it in two parts. In the first part we created the database, the backend, and fetched the content of the database to display it using a React component. Here, in the second part we continue by adding additional functionality: create, update and delete and dockerize the backend and the frontend.
The application's full code is available on Github
Software versions:
- OS: Ubuntu 20.04.2 LTS
- Java: openjdk 11.0.10
- node: v14.15.4
- npm: 6.14.10
- Docker: 20.10.3
- docker-compose 1.28.2
- MySQL is not installed on my Computer, it runs only inside a Docker Container.
Adding Create Functionality
In Eclipse add the following snippet to CustomerController class:
    @PostMapping("/customers")
    public Customer createCustomer(@RequestBody Customer customer) {
        return repository.save(customer);
    }
Make sure that org.springframework.web.bind.annotation.PostMapping gets imported, then relaunch the Application.
We also need to modify our frontend. The following method needs to be added to CustomerService.js class:
 createCustomer(customer) {
        return axios.post(CUSTOMER_API_BASE_URL, customer);
 }
The axios.post here corresponds to the @PostMapping annotation of our Backend.
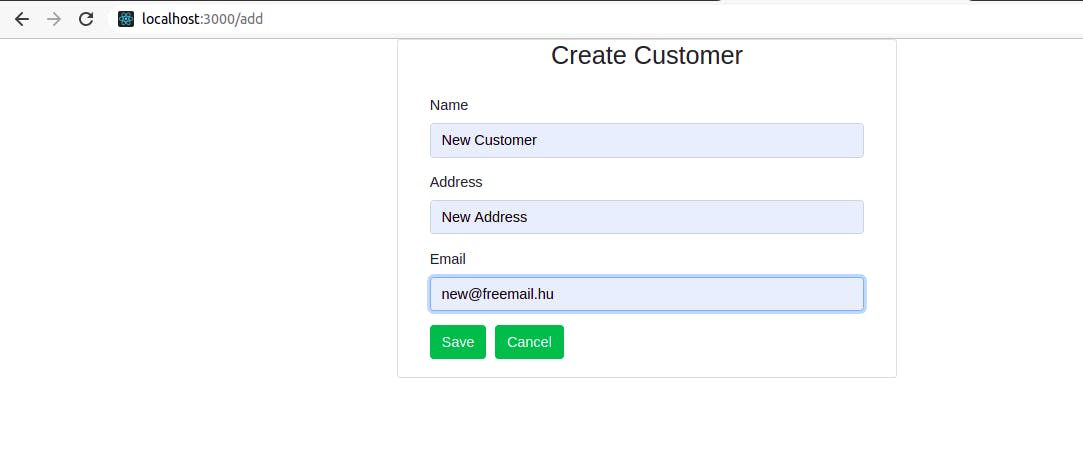
We also need to create a new component. Create a new file and name it components/CreateHook.js
Again, it is not a class but a function-based react component. It demonstrates perfectly how to use the useState hooks.
The content should be the following:
import React, { useState } from 'react';
import CustomerService from '../services/CustomerService';

const CreateHook = (props) => {

    const [name, setName] = useState('');
    const [address, setAddress] = useState('');
    const [email, setEmail] = useState('');
    const id = props.match.params.id;

    const changeNameHandler = (event) => {
        setName(event.target.value);
    }

    const changeAddressHandler = (event) => {
        setAddress(event.target.value);
    }

    const changeEmailHandler = (event) => {
        setEmail(event.target.value);
    }

    const saveCustomer = (event) => {
        event.preventDefault();
        let cust = { name: name, address: address, email: email };
        CustomerService.createCustomer(cust).then(res => {
            props.history.push('/customers');
        })
    }

    const cancel = () => {
        props.history.push('/customers');
    }

    const pageTitle = () => {
        return "Add Customer";
    }

    return (
        <div className="container">
            <div className="row">
                <div className="card col-md-6 offset-md-3">
                    <h3 class="text-center"> {pageTitle()}</h3>
                    <div className="card-body">
                        <form>
                            <div className="form-group">
                                <label> Name</label>
                                <input name="name" placeholder=" Customers Name" className="form-control"
                                    value={name} onChange={changeNameHandler} />
                            </div>

                            <div className="form-group">
                                <label>Address</label>
                                <input name="address" placeholder="Address" className="form-control"
                                    value={address} onChange={changeAddressHandler} />
                            </div>

                            <div className="form-group">
                                <label>Email</label>
                                <input name="email" placeholder="Email" className="form-control"
                                    value={email} onChange={changeEmailHandler} />
                            </div>
                            <button className="btn btn-success" onClick={saveCustomer}>Save</button>
                            <button className="btn btn-success" onClick={cancel} style={{ marginLeft: "10px" }}>Cancel</button>

                        </form>
                    </div>
                </div>
            </div>
        </div>
    )

}

export default CreateHook
Inside return there is a form with three fields and a submit button. The button will call service, and service will call our Backend.
In order to use this new component, we need Routing.
Let's install it first: npm install react-router-dom
Replace the content of App.js with the following:
import { BrowserRouter, Route, Switch } from 'react-router-dom';
import CustomerHook from './components/CustomerHook';
import CreateHook from './components/CreateHook';
function App() {
  return (
    <div>
      <BrowserRouter>
        <div className="container">
          <Switch>
            <Route path="/" exact component={CustomerHook}></Route>
            <Route path="/customers" component={CustomerHook}></Route>
            <Route path="/add" component={CreateHook}></Route>
          </Switch>
        </div>
      </BrowserRouter>
    </div>
  );
}

export default App;
The 'exact' word next to <Route path="/" is extremely important! Without it the CreateHook component never gets rendered!
The Route path="/add" is also important. It corresponds props.history.push('/add'); inside CreateHook.
We also need to add a button inside CustomerHook.js. This is the button that will fire the CreateHook component. Below is the only part that needs to be added to CustomerHook
               .....
               <button className="btn btn-primary" onClick={addCustomer}>
                    Add New Customer
                </button>
               .......
With this we are done with creating (and saving) new Customers.
Adding Update and Delete Functionality
In Eclipse add the following snippets to CustomerController class:
@GetMapping("/customers/{id}")
    public ResponseEntity<Customer> getCustomerById(@PathVariable Long id) {
        Customer ret = repository.findById(id)
                .orElseThrow(() -> new RuntimeException("Problem with getCustomerByI id = "+ id ));
        return ResponseEntity.ok(ret);
    }

    @PutMapping("/customers/{id}")
    public ResponseEntity<Customer> update(@PathVariable Long id, @RequestBody Customer customer) {
        Customer ret = repository.findById(id)
                .orElseThrow(() -> new RuntimeException("Problem with update id = "+ id + customer.toString()));

        ret.setAddress(customer.getAddress());
        ret.setName(customer.getName());
        ret.setEmail(customer.getEmail());

        repository.save(ret);

        return ResponseEntity.ok(ret);
    }

    @DeleteMapping("/customers/{id}")
    public ResponseEntity<Boolean> delete(@PathVariable Long id) {
        Customer ret = repository.findById(id)
                .orElseThrow(() -> new RuntimeException("Problem with delete id = "+ id ));
        repository.delete(ret);
        return ResponseEntity.ok(Boolean.TRUE);
    }
Make sure that everything gets imported. We also need to modify CustomerService.js by adding:
 getCustomerById(id) {
        return axios.get(CUSTOMER_API_BASE_URL + '/' + id);
    }

    updateCustomer(customer, id) {
        return axios.put(CUSTOMER_API_BASE_URL + '/' + id, customer);
    }

    deleteCustomer(id) {
        return axios.delete(CUSTOMER_API_BASE_URL + '/' + id);
    }
The only thing that we need to change in App.js is this:
Instead of <Route path="/add" we need <Route path="/add/:id"
Below the full code:
import { BrowserRouter, Route, Switch } from 'react-router-dom';
import CustomerHook from './components/CustomerHook';
import CreateHook from './components/CreateHook';

function App() {
  return (
    <div>
      <BrowserRouter>
        <div className="container">
          <Switch>
            <Route path="/" exact component={CustomerHook}></Route>
            <Route path="/customers" component={CustomerHook}></Route>
            <Route path="/add/:id" component={CreateHook}></Route>
          </Switch>
        </div>
      </BrowserRouter>
    </div>
  );
}

export default App;
We need however several changes in CustomerHook component. Here we add new buttons for update and delete and the corresponding functions. Note addCustomer will use the value of -1 indicating the creation of a new entry, whereas editCustomer will use the existing id of an already existing Customer. In both cases we use the same form CreateHook component. Below the full code of CustomerHook.js:
import React, { useState, useEffect } from 'react';
import CustomerService from '../services/CustomerService';


const CustomerHook = (props) => {

    const [customers, setCustomers] = useState([]);

    useEffect(() => {
        CustomerService.getAllCustomers().then((res) => {
            setCustomers(res.data);
        })
    })

    const addCustomer = (() => {
        props.history.push('/add/-1');
    });

    const editCustomer = ((id) => {
        props.history.push(`/add/${id}`);
    });

    const deleteCustomer = ((id) => {
        CustomerService.deleteCustomer(id).then((res) => {
            props.history.push('/customers');
        });
    });

    return (
        <div>
            <h2 className="text-center">These Companies are our Customers</h2>
            <div>
                <button className="btn btn-primary" onClick={addCustomer}>
                    Add New Customer
                </button>
            </div>

            <div className="row">
                <table className="table table-striped table-bordered">
                    <thead>
                        <tr>
                            <th>Name</th>
                            <th>Address</th>
                            <th>email</th>
                            <th>Actions</th>
                        </tr>
                    </thead>
                    <tbody>
                        {customers.map(
                            cust =>
                                <tr key={cust.id}>
                                    <td>{cust.name}</td>
                                    <td>{cust.address}</td>
                                    <td>{cust.email}</td>
                                    <td>
                                        <button onClick={() => editCustomer(cust.id)} className="btn btn-info">Update</button>
                                        <button onClick={() => deleteCustomer(cust.id)} className="btn btn-danger">Delete</button>
                                    </td>

                                </tr>
                        )}
                    </tbody>
                </table>
            </div>
        </div>
    )
}

export default CustomerHook
There are also certain changes in CreateHook component regarding whether we use this component for creating a brand new Customer or modifying an existing one. Below the full code:
import React, { useState, useEffect } from 'react';
import CustomerService from '../services/CustomerService';

const CreateHook = (props) => {

    const [name, setName] = useState('');
    const [address, setAddress] = useState('');
    const [email, setEmail] = useState('');
    const id = props.match.params.id;

    useEffect(() => {
        if (id == -1) {
            return;
        }
        CustomerService.getCustomerById(id).then((res) => {
            let cust = res.data;
            setName(cust.name);
            setAddress(cust.address);
            setEmail(cust.email);
        })
    }, [])


    const changeNameHandler = (event) => {
        setName(event.target.value);
    }

    const changeAddressHandler = (event) => {
        setAddress(event.target.value);
    }

    const changeEmailHandler = (event) => {
        setEmail(event.target.value);
    }

    const saveCustomer = (event) => {
        event.preventDefault();
        let cust = { name: name, address: address, email: email };
        if (id < 0) {
            CustomerService.createCustomer(cust).then(res => {
                props.history.push('/customers');
            })
        } else {
            CustomerService.updateCustomer(cust, id).then(res => {
                props.history.push('/customers');
            })
        }
    }

    const cancel = () => {
        props.history.push('/customers');
    }

    const pageTitle = () => {
        if (id < 0) {
            return "Add Customer";
        } else {
            return "Update Customer";
        }
    }

    return (
        <div className="container">
            <div className="row">
                <div className="card col-md-6 offset-md-3">
                    <h3 class="text-center"> {pageTitle()}</h3>
                    <div className="card-body">
                        <form>
                            <div className="form-group">
                                <label> Name</label>
                                <input name="name" placeholder=" Customers Name" className="form-control"
                                    value={name} onChange={changeNameHandler} />
                            </div>

                            <div className="form-group">
                                <label>Address</label>
                                <input name="address" placeholder="Address" className="form-control"
                                    value={address} onChange={changeAddressHandler} />
                            </div>

                            <div className="form-group">
                                <label>Email</label>
                                <input name="email" placeholder="Email" className="form-control"
                                    value={email} onChange={changeEmailHandler} />
                            </div>
                            <button className="btn btn-success" onClick={saveCustomer}>Save</button>
                            <button className="btn btn-success" onClick={cancel} style={{ marginLeft: "10px" }}>Cancel</button>

                        </form>
                    </div>
                </div>
            </div>
        </div>
    )

}

export default CreateHook
Now we are ready with the CRUD Application. But apart from the MySQL database it hasn't yet been dockerized. Let's fix it now.
Dockerizing Backend and Frontend.
Dockerizing Backend
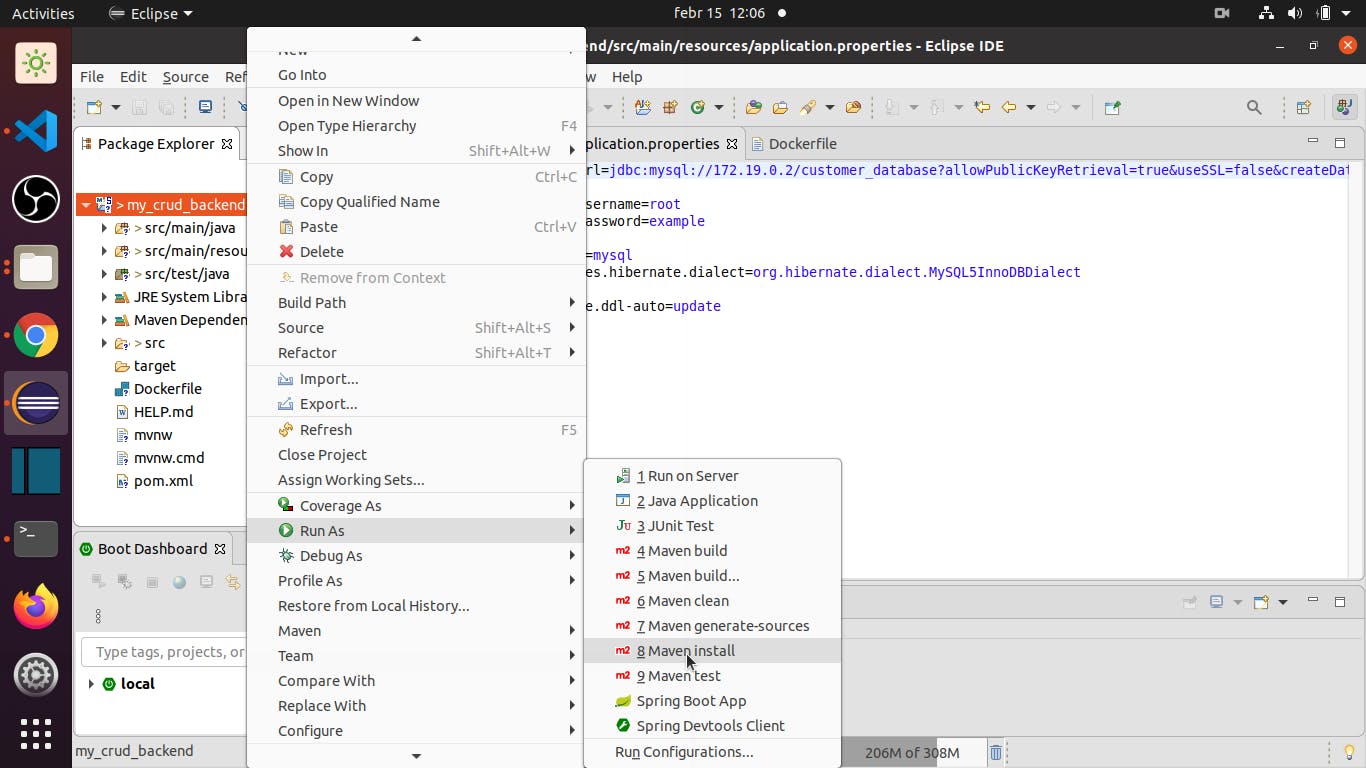
Let's run a maven-install first:
Then let's create a file called Dockerfile in the project's root folder. It must have the very same name and must not have any extension. Fill it with the following content:
FROM openjdk:11
VOLUME /tmp
ADD   /target/my_crud_backend-0.0.1-SNAPSHOT.jar app.jar
ENTRYPOINT ["java", "-Xmx750m", "-jar","/app.jar"]
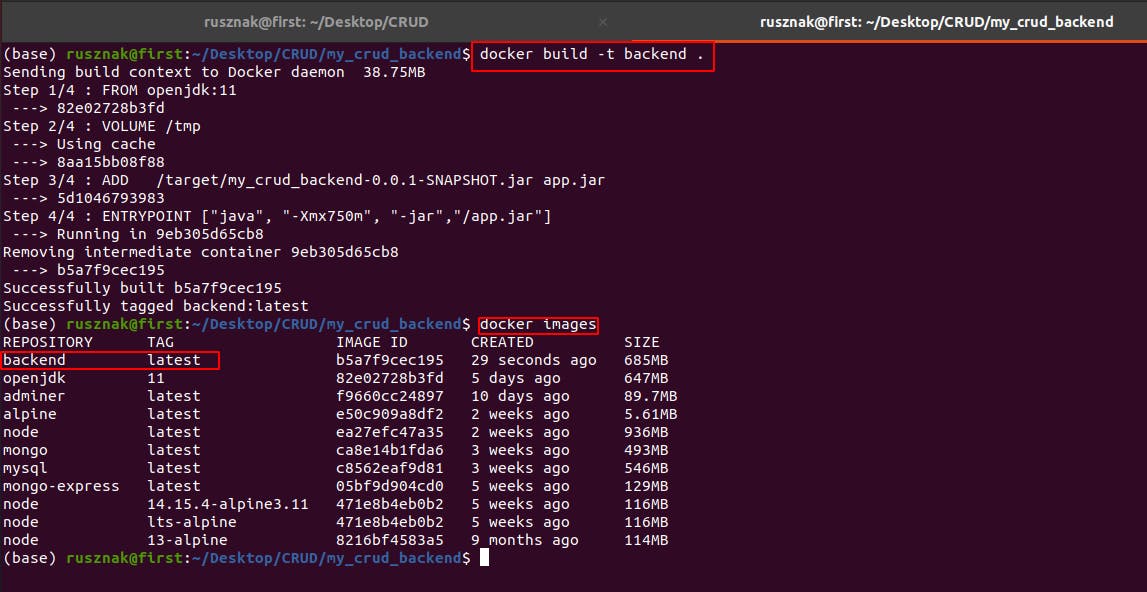
Let's use Dockerfile to create a backend docker image. For this we need to run
docker build -t backend . from the directory where our Dockerfile is located. The result should be something like this.
We need to create a Container from this image.
The docker run -d --name running_backend_container --network crud_default -p 8080:8080 backend command will do just that.
- -d means the container runs in detached mode (so it doesn't hog the terminal)
- --name indicates the name int this case running_backend_container
- --network here we need the name of the network which is used by MySQL container.
We get this by typing
docker network ls - -p indicates the port. We leave it unchanged this time.
- The last parameter
backendrefers to the name of the image. We can usebackendorbackend:latest.

Now our frontend application should be working even if we shut Eclipse down.
But there is a more convenient way to start a Container. We can delegate the creation of the backend container to docker-compose
For this we need to stop the MySQL docker container.
docker-compose -f docker-compose-file-example.yaml down
Also shut down any other containers that might be running:
docker rm container $(docker ps -aq)
Open docker-compose-file-example.yaml and replace its content with the followings:
 services:
  adminer:
    image: adminer
    restart: always
    ports:
      - 8888:8080
  db:
    image: mysql:latest
    restart: always
    environment:
      MYSQL_ROOT_PASSWORD: 'example' # TODO: Change this
    volumes:
     - "./data:/var/lib/mysql:rw"
  backend:
    image: backend:latest
    restart: always
    ports:
      - 8080:8080
    environment:
    - SPRING_DATASOURCE_URL=jdbc:mysql://db:3306/customer_database?allowPublicKeyRetrieval=true&useSSL=false&createDatabaseIfNotExist=true
    - SPRING.DATASOURCE_USERNAME=root
    - SPRING.DATASOURCE_PASSWORD=example
Note that we no longer refer to a specific IP Address after SPRING_DATASOURCE_URL, we just need to refer to the name of container of MySQL database which is db in this case.
There is also no need to specify the network. It will be automatically assigned.
Run docker-compose -f docker-compose-file-example.yaml up
This command now will start three containers including backend.
With this we have successfully dockerized our backend. Note, that if you modify anything in backend, you also need re-build the image and re-start the containers.
Dockerizing Frontend.
Stop the npm server. Create a Dockerfile in the root directory of the frontend project. Here comes its content:
FROM node:14.15.4-alpine3.11
WORKDIR /app
ADD . .
RUN npm install
CMD npm start
Make another file at the same place and name it dockerignore. As its name says its content will be ignored by docker. Fill it with the followings:
# Items that don't need to be in a Docker image.
# Anything not used by the build system should go here.
Dockerfile
.dockerignore
.gitignore
README.md

# Artifacts that will be built during image creation.
# This should contain all files created during `npm run build`.
build
node_modules
Run docker build -t frontend . to build an image with the name frontend:latest.
After this modify docker-compose to add frontend:
below is the full file:
services:
  adminer:
    image: adminer
    restart: always
    ports:
      - 8888:8080
  db:
    image: mysql:latest
    restart: always
    environment:
      MYSQL_ROOT_PASSWORD: 'example' # TODO: Change this
    volumes:
     - "./data:/var/lib/mysql:rw"
  backend:
    image: backend:latest
    restart: always
    ports:
      - 8080:8080
    environment:
    - SPRING_DATASOURCE_URL=jdbc:mysql://db:3306/customer_database?allowPublicKeyRetrieval=true&useSSL=false&createDatabaseIfNotExist=true
    - SPRING.DATASOURCE_USERNAME=root
    - SPRING.DATASOURCE_PASSWORD=example #TODO Change this
  frontend:
    image: frontend:latest
    restart: always
    ports:
      - 3000:3000
And we are DONE!!! Our whole application is running from docker containers. Congrats! You have made it till the end. Enjoy it :-)
